
How To Add a Contact Us Form Code and Create a Contact Us Page in Blogger
Option 1: Supporting by 123 Form Builder
Following this steps
1 – Go To 123 Form Builder and Create A Free Account
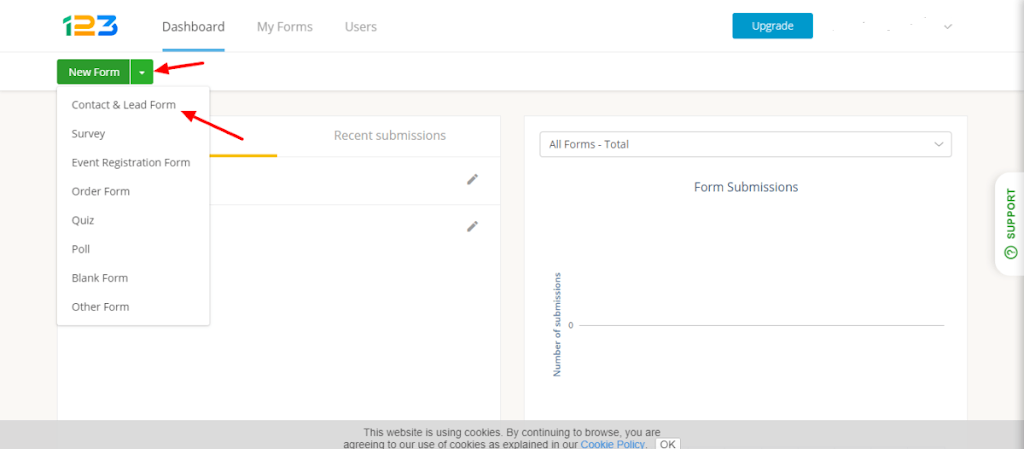
2 – Login To Your Dashboard
3 – Click On The Arrow Next To The Create A New Form Button.
4 – Click on contact form & Lead form option.

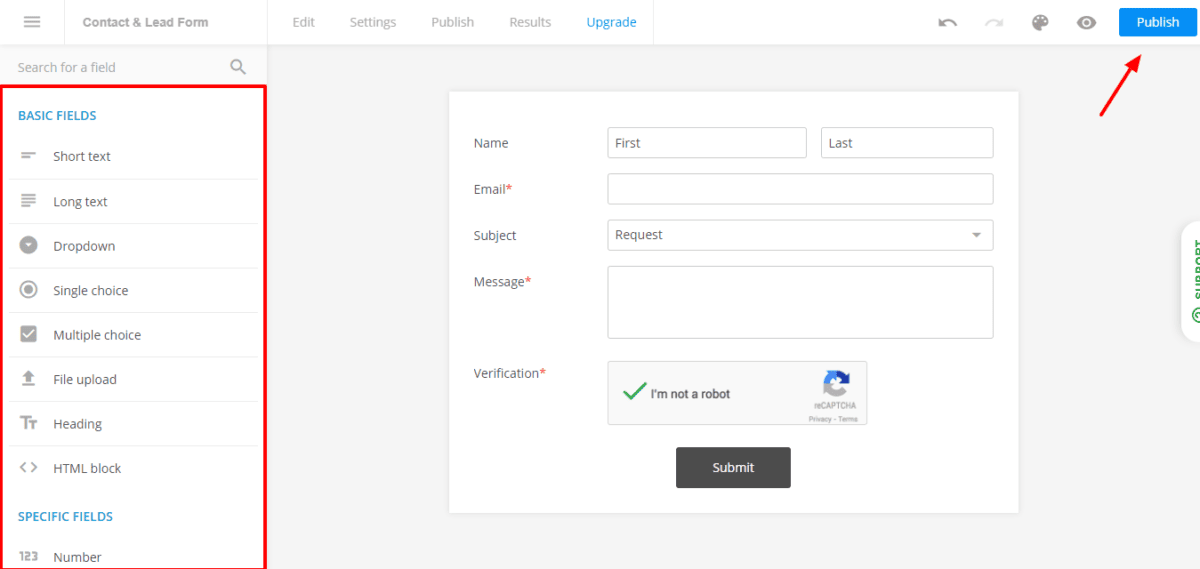
5 – Click on save and publish button.
6 – Copy the java script code from the screen. ( CTRL + C )

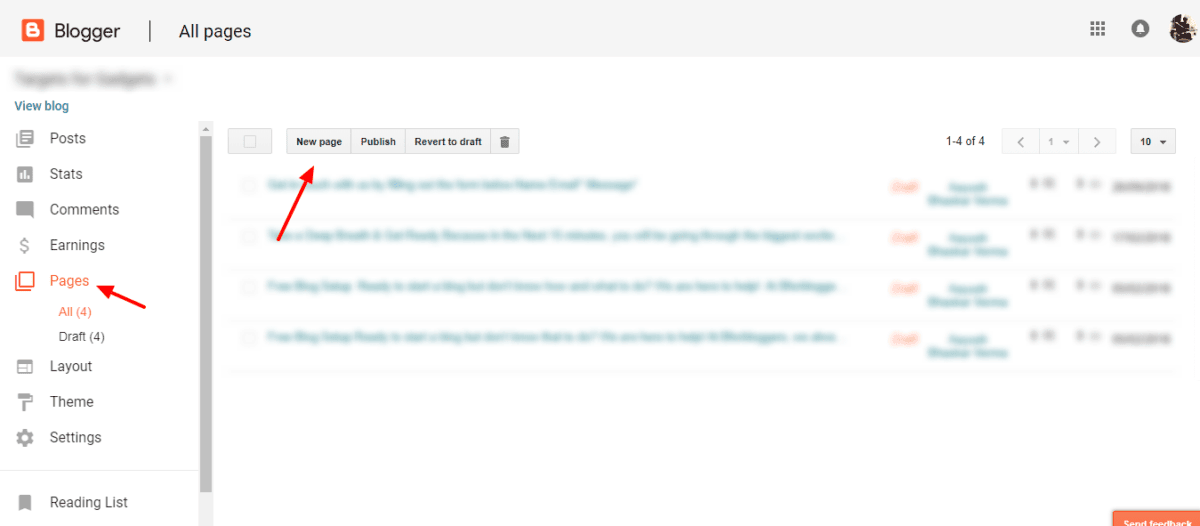
7 – Go to your Blogger blog dashboard and click on add new page. Name this page, “Contact Us.”
8 – Click on the HTML format editor button and paste the code here paste by ( CTRL + V ) and click publish.
Your contact form is now live on your blog.
Let’s move to our second method
Option 2: – Customizing the Blogger “Contact Us” Gadget
Following this steps
1 – Go to your Blogger dashboard
2 – click on the layout tab.
3 – Click on add new gadget.

Step 4 – Select the contact us widget from the menu and
Step 5 – click on the add button. Uncheck the visible option and save the widget.

Step 6 – Add a new page to your blog. Name as this page, “Contact Us.” In the HTML editor copy and paste the following HTML contact form code:
<div id=”custom_ContactUsFromForBlogSpotBlogger” class=”widget ContactForm”>
<div class=”contact-form-widget”>
<p>Get in touch with us by filling out the form below.</p>
<div class=”form”>
<form name=”contact-form”>
<p></p>
Your Name
<br>
<input type=”text” value=”” size=”30″ name=”name” id=”ContactForm1_contact-form-name” class=”contact-form-name”>
<p></p>
Your Email
<span style=”font-weight: bolder;”>*</span>
<br>
<input type=”text” value=”” size=”30″ name=”email” id=”ContactForm1_contact-form-email” class=”contact-form-email”>
<p></p>
Your Message
<span style=”font-weight: bolder;”>*</span>
<br>
<textarea rows=”5″ name=”email-message” id=”ContactForm1_contact-form-email-message” cols=”25″ class=”contact-form-email-message”></textarea>
<p></p>
<input type=”button” value=”Send” id=”ContactForm1_contact-form-submit” class=”contact-form-button contact-form-button-submit”>
<p></p>
<div style=”text-align: center; max-width: 222px; width: 100%”>
<p id=”ContactForm1_contact-form-error-message” class=”contact-form-error-message”></p>
<p id=”ContactForm1_contact-form-success-message” class=”contact-form-success-message”></p>
</div>
</form>
</div>
</div>
<div class=”clear”></div>
<span class=”widget-item-control”>
<span class=”item-control blog-admin”>
<a title=”Edit” target=”configContactForm1″ onclick=”return _WidgetManager._PopupConfig(document.getElementById(“ContactForm1″));” href=”//www.blogger.com/rearrange?blogID=8799058979810298021&widgetType=ContactForm&widgetId=ContactForm1&action=editWidget§ionId=sidebar-right-1″ class=”quickedit”>
<img width=”18″ height=”18″ src=”// ( Change it your original Icon path )Your source code for icon image alt=””>
</a>
</span>
</span>
<div class=”clear”></div>
</div>
Important – Should be change the BlogID Highlighted in code of the above code with your blog’s original ID. You can find your BlogSpot blogID by going to your BlogSpot blog dashboard and looking at your URL in the browser’s’ address bar.